4. Fab: Enclosure
- Astro Lee

- Mar 6, 2024
- 3 min read
I wanted to create a perfect box out of acrylic, and for an art purpose.
So I decided to make a Gallery Box, and I started by drawing out what I want to make. I wanted to make a box that hold cartridges of image frames, or slices of mesh that comes together to create a mock-3D form in real life.

Then I realized that I have to be more specific with the dimensions for the box I want. I wanted a box that is 4 by 2.5, and sooner I realized that things get more complicated as I draw them out, and thinking about what stacks what.
There was a lot more math and measuring involved in this process that was very very tedious, but once I had all the specifics figured out and had a well-thought out plan, it was nice to rely on this foundation I built for this project.
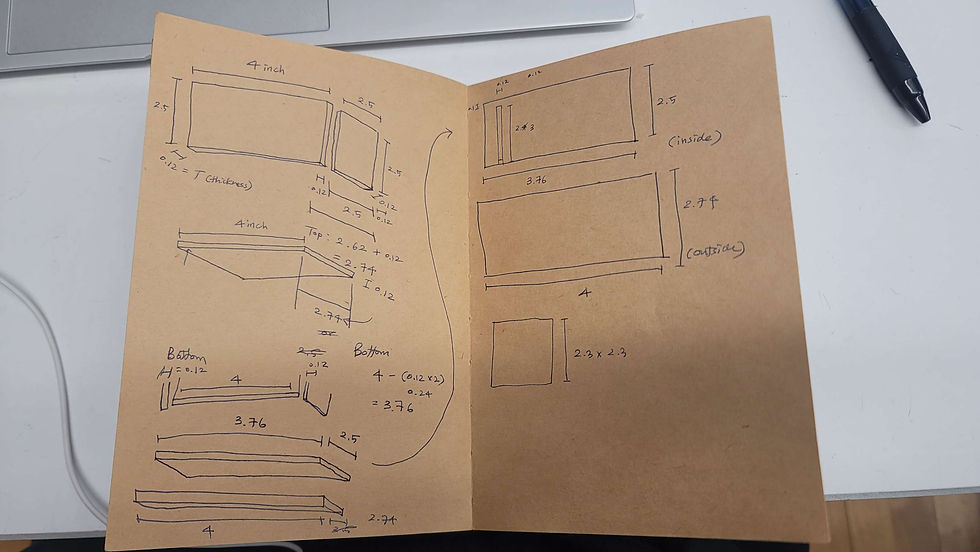
And hands on, I started this process by making the top lid, which I understood best from the whole structure. It was interesting how much thought goes into this one single small piece. I used the number 4 glue I bought at Canal Plastics, where I also bought the acrylic sheets.

Then, I moved into my beloved 3D software, Houdini.
Here I got a free Shark model from CG trader and dropped it into Houdini to prep for render.

Made a shark-to-grid intersection, and keyframed the shark to go through the grid to get their intersecting part. I made the animation 17 frames to fit the total count of 19 slices, with the last two slices being buffers for the physical setup.
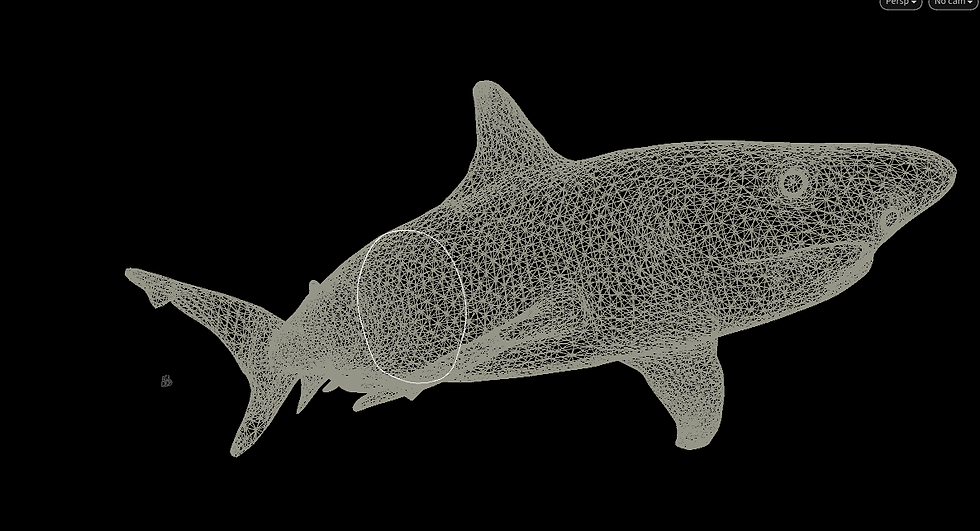
Then from the line, I gave it depth and somewhat a mesh to have something to render.

A far away view of the intersecting part between the shark and the invisible grid.

Then I set up a camera to be looking at the shark nose front, to get the flat angle of the sliced part.

And with 17 frames of these slices rendered them as PNGs and moved them into Illustrator to raster on the acrylic panels for my enclosure.
Then I started cutting them into frame slices.
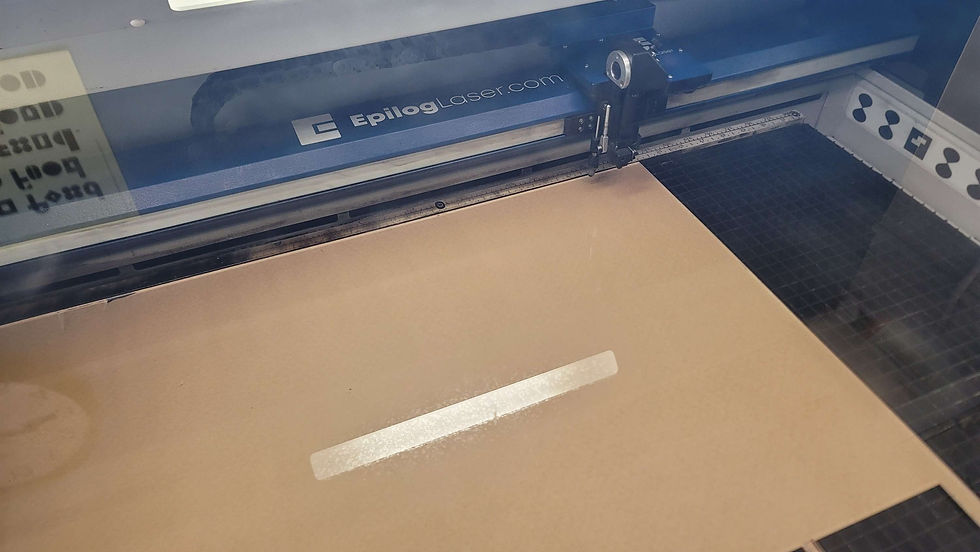
But oddly the laser cutter was moving like it was etching, but nothing was showing up on my material. I was confused.
But then it cut fine through the whole sheet, so I was a little more confused, and started asking for help. Phil was around, so he was able to help me with the machine.

And I learned that apparently, the value on the sheet was wrong / or I was supposed to manipulate the power a whole lot more to get it to raster.


And with Phil's magic touch ✨✨ the laser cutter started to act right again, and it etched as I inteded to.

--> Seeing these frames etch was very satisfying.
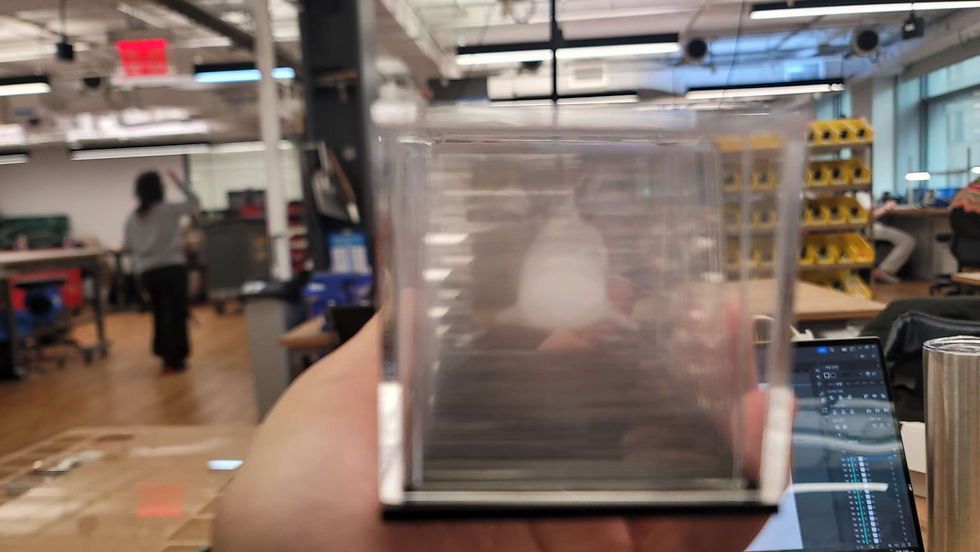
After getting the full stack of 19 frames, I peeled them one by one.

It felt really great to see this physical result of what I created digitally. (Oh and I also made the bottom to contain the panels of frames)

My table got really messy at this point, especially because I was bouncing back and forth between fabrication and Pcomp stuff. I was truoble shooting with the help of Bianca. So many awesome people on the floor :)

Then, I assembled everything, and I got what I wanted! + It looked pretty cool.

The mock 3D effect was present, which made me happy.

And then once I assembled everything, there was also an aspect I didn't expect. I made a decimal inch value of buffer room at the ceiling of the enclosure, and that caused issues with holding these plates in place. They were jiggly, which was fun, but what I didn't want. (It looks very pretty though from the side)

So, although this project has wrapped up for the week, I had ideas on how to make it better. (Last note I added after I made the whole thing!)

So hopefully in the future I will make this adjustment so I prevent the jiggle effect from my gallery box.


Comments